Monday, March 14, 2011

Heard:

At last Friday's Lenten Fish Fry

We were all tremendously excited about the bounty the dessert table had to offer.  One can almost guarantee that every selection is homemade, someone's Grandma is responsible for the best stuff, and the rice crispy treats are the lame contribution of the parishioner saddled with enough Catholic guilt to oblige in a dessert donation.

D: (on the way to the dessert table) "Do they have ice cream over there too?!?!"

The Holy Sea? (get it...seA...fish...)
S: "Where do you think you are...the Vatican?"

May Cod Have Mercy on Your Sole

We are currently in the beginning of the Lenten season and regardless of you belief system you can all dig it...'cause Lent offers one of the most fabulous things on the planet...Friday Fish Frys!

Seriously all walks of life are welcomed with open arms at these parishes and thank goodness, because you seriously wouldn't want to miss out on this spectacular food tradition.  The food may vary from parish to parish, denomination even, but one thing is certain...fish, glorious fish, golden, brown, and delicious.

The Spread

In my neck of the woods the fish of choice is generally catfish or cod (baked cod is an option...but really why waste your time).  Loads of sides are available, generally a pretty decent beer selection (Catholics like to knock 'em back you know), and a dessert table with enough options to cause a deep existential crisis.

Decisions, decisions

I am an avid follower of Lenten Friday Fish Fry.  I really enjoy parish hopping and eating myself silly...and I bet you would too.  You can find a list of fish frys in your area by simply clicking here: The Ultimate Fish Fry Guide

This is just a sample of the goodness that awaits you (and more specifically what I devoured last Friday):

Fried catfish, mac and cheese, potato salad, two slices of rye bread with butter (yeah, I'm not afraid of starches), and some very well hidden green beans.
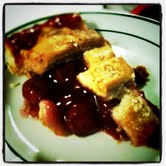
And lest we forget the dessert that undoubtedly someone's Granny slaved away on (seriously you can taste the love):
Sweet Cherry Pie

Fish be with you and may cod have mercy on your sole!

Friday, March 11, 2011

It's Recipe Friday Y'All, Salsa Edition!

I have already established my love for all things avocado so no big surprises that they are an ingredient in this dish.  The main attraction however is this:


Named for it's crimson flesh, the blood orange is one of my favorite citrus fruits (with meyer lemons at the top of the list!). It stains everything in its path and has an almost raspberry like flavor to it.  The dark flesh is produced when the trees are grown in a climate with cool nights.  They are currently in season (December to March for the Texas varieties) and reasonably priced at my local market (bonus points this little puppy has more antioxidants than anyone else in the family...major).  They are so stinking beautiful inside I had to come up with a way to utilize them and because I like a challenge I went for the savory side things.

Savory Blood Orange and Avocado Salsa

What you'll need*: 

*These measurements are approximate, it's a salsa play around with it!

The goods
1 blood orange
1 medium avocado
1/4 C. chopped red onion
2 tsp. minced jalapeno
1 1/2 Tbl. minced cilantro
1 lime, juiced


What to do:

Supreme your orange.  What's that you need a tutorial?  Granted!

Supreme is just a fancy way of saying "wedge that puppy up" but more accurately your end result will be segments of citrus with no rind or pith or membrane.

Cut a small slice off one end of the orange.  You are creating a flat surface for the orange to rest upon while you work
Now ever so carefully round your knife down around the skin to remove the rind and pith (that white fuzzy stuff).  Do this in small segments taking care not to lob off too much flesh in the process. 
Here comes the fun part.  Run your blade between the end of the white membrane separating the segment and the flesh itself.  Repeat on the other side of the segment and it will release itself from the rest of the pack.  
This is what you are aiming for.  Don't worry it takes some practice.  Be careful as you are cutting because you'll be holding the actual fruit in your hand.  This should be a zen experience, focus, don't multi-task when you have the potential to drive said blade straight into the palm of your hand.  Also I recommend working over a bowl while you do this.  No sense in letting all that delicious juice go to waste.  You'll basically be left with the shell of what was once a spherical ball of fruit.  Give it a good squeeze over your work bowl so you don't waste that juicy goodness.

Ok now that that is out of the way...you'll want to dice your avocado.

What?  You want my short cut?  Granted!

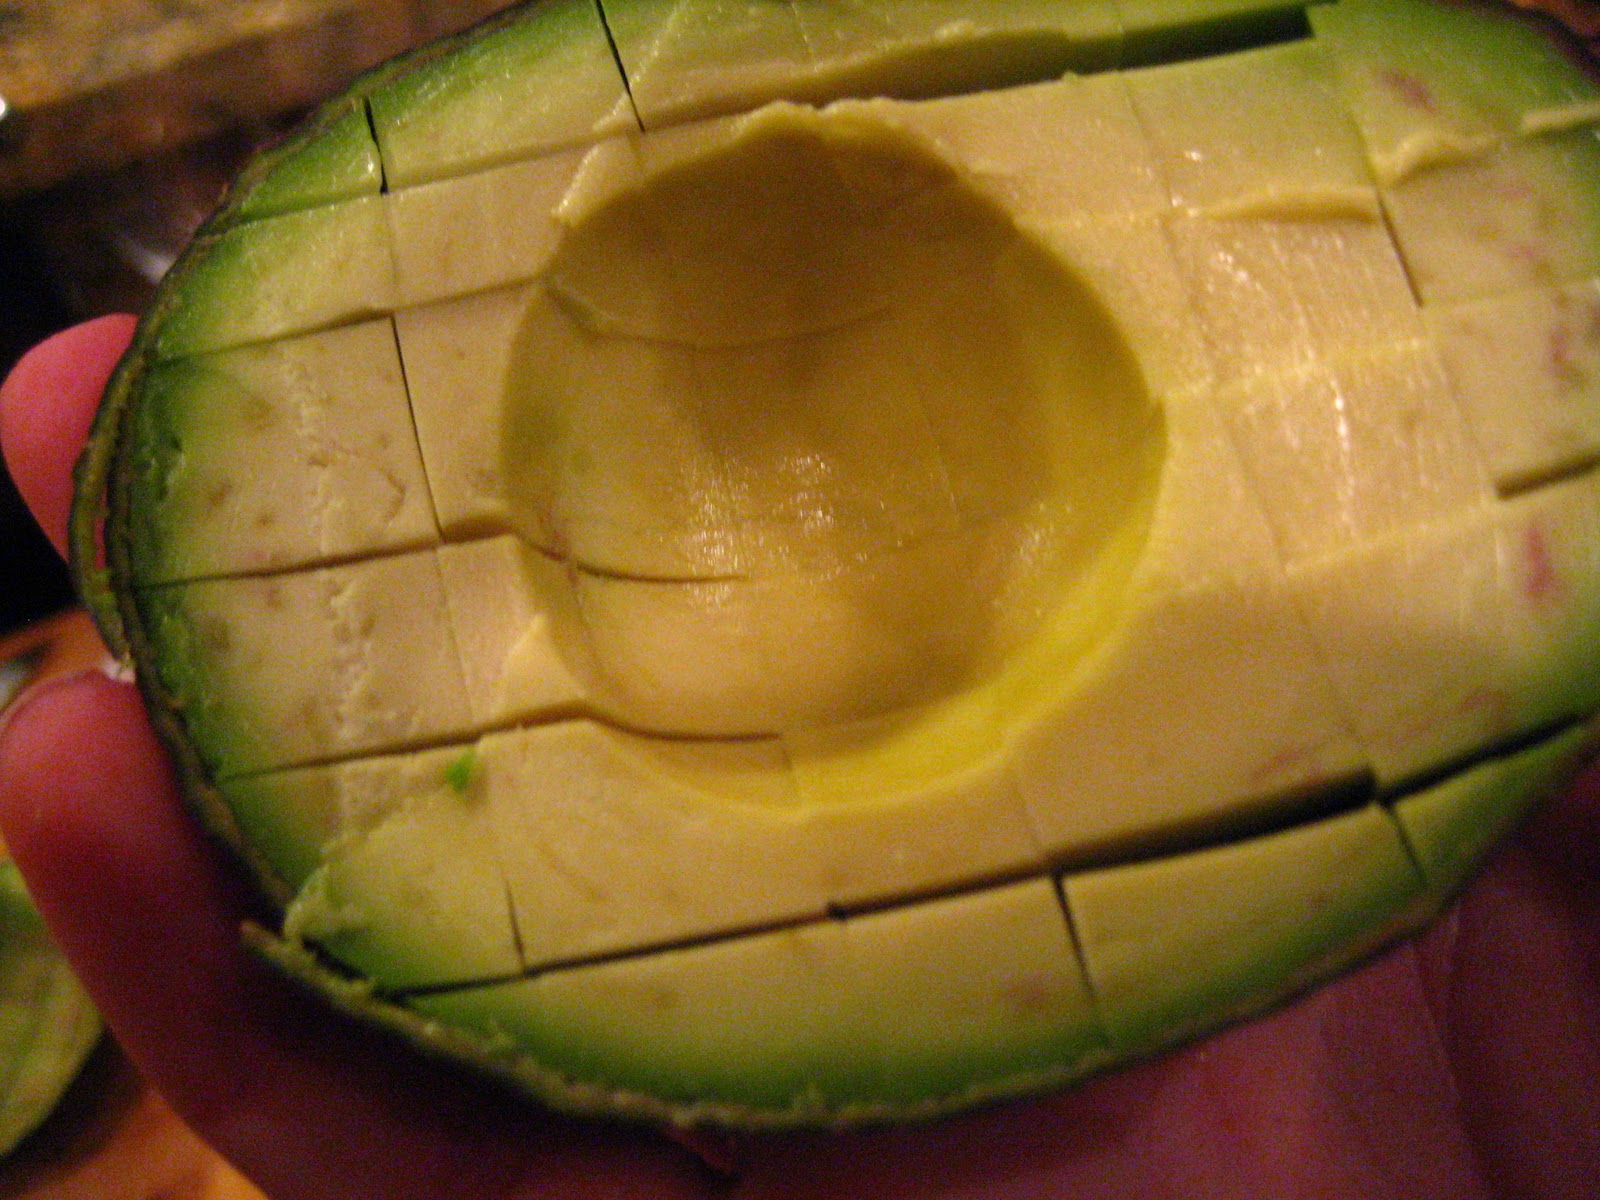
First things first...give a horizontal cut around the avocado creating two spheres.  Carefully whack your blade into the pit to remove it while leaving the fruit intack.  Then...

Run your knife in vertical cuts along the width of the avocado.  Again careful with that blade.  
Turn the avocado vertically and create another series of horizontal cuts.  Bravo you just cubed that sucker up.  Now grab a spoon and gently release those precious cubes from the skin.  No biggie if they aren't perfectly even!
Add avocado to the bowl of orange segments and juice.  Add onion, jalapeno, cilantro, and lime juice.  Stir to gently blend and add salt and pepper to taste.  


This is the finished product and can be used in oh so many satisfying ways:

(Blood) Orange ya glad you know how to make this?!?
I chose to serve mine over pan seared chicken thighs (something about the acid with the fatty crispy skin gets me).  But this would be equally as delicious over fish or you could double the batch throw in some corn, black beans, and a bit of cumin and serve it as a cold summer salad.  

Savory blood orange and avocado salsa over pan seared chicken thighs served with cumin and cilantro scented corn and black beans with green chilies, creme fraiche, and Monterey jack cheese.
Ole!


Friday, March 4, 2011

It's Recipe Friday Y'All, Gelato Edition!

We are by now all aware of my intense love of (borderline unhealthy obsession with) Nutella.  I also spent two weeks eating my body weight in Gelato as a young girl in Italy.  If you were to say combine these two things into the most holy union of all time I'm pretty sure it would be the password into heaven:

Saint Peter: Kid it looks like you had a great time down there, lots of food, lots of friends, lots and lots of questionable reality tv.  We'd love to let you in, but kid, what's the password? (I also imagine Saint Peter as a prohibition era thug in a zoot suit with a really raspy voice and a face straight out of Dick Tracey)

Me: (breathlessly) Nutella...Gelato...

(admittedly I totally stole this scenario from a dear friend...but she's absolutely right...mark her words folks...it's gonna be the password!)

And so without further ado I present to you:

The Pearly Gates' Nutella Gelato

What you'll need:
Your mise en place

2 C. whole milk
1 C. heavy cream
1/2 C. sugar, plus 1/4 C.
4 egg yolks
1/2 tsp. vanilla extract
1/2 C. Nutella


What to do:

In a saucepan combine the milk, cream and 1/2 C. sugar over medium heat.  Cook until the sugar dissolves.  Approximately 5 minutes.

Medium heat folks, we're not cooking anything just yet

Meanwhile, in a medium bowl whip the egg yolks with the remaining 1/4 C. of sugar using your trusty electric mixer until the eggs have become thick and pale yellow.  Approximately 4 minutes (this takes a bit of multi-tasking so opt for the stand mixer or recruit a friend).

Consistency of egg and sugar mixture after 4 minutes

Pour 1/2 C. of the warm milk and cream mixture into the egg mixture and stir.  This is a little process we like to call tempering.  Click here for a bit more info. on the process.

Tempering the eggs

Add this mixture back into the saucepan.

Cook over low to medium heat, stirring constantly, until the mixture becomes thick enough to coat the back of a wooden spoon (the technical term for you food geeks is nape and you are creating a creme anglaise).  Approximately 10-15 minutes.

Run your finger through the mixture,
if a line appears and remains you've reached the correct consistency

Place a strainer over a medium bowl and pour the warm custard mixture through the strainer.

Just in case that tempering was all for not and you end up with scrambled bits

Whisk in the vanilla followed by the Nutella until it dissolves.

Vanilla
Combine
Nutella

Chill mixture completely before pouring into an ice cream maker and follow manufacturer's instructions to freeze.

Patience is a virtue when waiting at the Pearly Gates!
Serve and enjoy!  I've garnished mine with a little bit of heaven called Kinder Bueno(look for more on that in the next Obsession Tuesday).

The Password! Enjoy!


Tuesday, February 22, 2011

Obsession Tuesday...Amaretto, it's not just for drinkin' anymore

I love a good cocktail and I must say I have grown particularly fond of anything containing this:

Disaronno on the rocks
I really can't get enough of it.  I love it on the rocks (ps check out those ice cubes pictured above...perfect huh?  You can find the trays on the link to your left) I love it with Ginger Ale, I love it in my coffee, as a Toasted Almond cocktail.  I'm sure it has much to do with my not so secret obsession with all things Italian.  Regardless it's a pretty rockin' liqueur.  

Amaretto comes from the Italian word "amaro" meaning bitter.  The history is a little fuzzy but, Disaronno (which has been around since 1592 with an unchanged formula...that's pretty impressive folks) claims to have been born of a lustful relationship between artist and muse.  

In 1525 Bernardino Luini was commisioned to paint a Saronno church with frescoes.  The church was dedicated to the Virgin Mary so naturally he needed a model.  She was a young widowed innkeeper who apparently had a thing for painters (can you blame her?).  She wanted to give him a gift of gratitude and affection but was flat broke with her husband six feet under and all.  So she did what any industrious Saranno woman would do and created a liqueur that has since been enjoyed for centuries.  The original recipe involved apricot kernels steeping in Brandy, and the rest, as they say, is history.  

Amaretto also makes a pretty steller addition to this amaaaaahhhhzing syrup:

Ciabatta Italian Toast with Amaretto Cream Syrup
It's incredibly easy to make and has a homemade element that could even jazz up Bisquick (gag) pancakes...if you're into that sort of thing.  

Amaretto Cream Syrup

What you'll need:

1 C. Water
1 C. packed brown sugar (I prefer dark)
2 Tbl. Amaretto
2 Tbl. whipping cream
1/2 tsp. ground cinnamon

What to do:

In a medium saucepan, bring the water and sugar to a boil over high heat, stirring until the sugar dissolves.  Boil until the syrup reduces to 1 cup, around 10 minutes.  

Turn heat down to medium and add Amaretto.  Simply heat through (we are just burning off the alcohol folks...I suppose you could skip this step if you prefer a little breakfast buzz...and really who doesn't) about 2 minutes.

Remove pan from heat and whisk in cream and cinnamon.  

Keep the syrup warm over low heat until read to serve.  

Syrup can be made ahead.  Cool, cover, and refrigerate.  Reheat before serving.  


Wednesday, February 16, 2011

An EPIC Food Pairing!

It's no secret that I am a sucker for reality tv.  I'll happily watch anything Bravo tells me.  But this...this people...this is the stuff dreams are made of (tune in tonight Wed. 2/16 10/9c Bravo Tv).


+


=


MOST EPIC EPISODE EVER!

I am absolutely devastated that my beloved Fabio is no longer competing. Could you imagine him attempting to communicate with Elmo? People that's comedy gold!  The only thing that could make this episode better (mind you I haven't even seen it yet...it's just that safe a bet) is the addition of one 
Chef Pepino Rodrigo Serrano Gonzales

I don't think my little Henson loving heart could handle it, so perhaps we are better off with the trifecta of monsters, Cookie, Telly, and Elmo!  I hope they show up a judges table.  Could you imagine a muppet telling you to "pack your knives and go"?


Tuesday, February 15, 2011

Obsession Tuesday...What's in a Name?

Ok so the good people of England could have perhaps thought through the naming of today's obsession a bit better...


I mean "Lemon Curd"...come on.  It sounds disgusting, off-putting even, enough to have you fleeing from your grocer's aisle at the very thought of it.  But lemon curd is oh so delicious and just a bit misunderstood.

For those of you terrified by the idea, allow me to enlighten you:

Lemon curd is actually a cousin of jam but generally made with a citrus fruit of some sort and gently cooked with eggs to make an intensely flavored spread.  It's often used on breakfast bread products and is an essential ingredient in any lemon-meringue pie worth its salt.

I prefer lemon curd made with the addition of butter as it is a bit creamier and not as intensely zippy as those spreads made without.  It's also incredibly easy to make yourself and you have the added bonus of knowing its not chalked full of preservatives and weird artificial flavorings.

This is my go to recipe for lemon curd and it can easily be altered with just about any other citrus juice you desire.  Try a little drizzle over vanilla ice cream with raspberries on a hot July day...you can thank me later.

Lemon Curd

What you'll need:

4 fluid oz. Lemon juice
6 1/2 oz. Granulated sugar
1 oz. Cornstarch
2 tsp. Lemon zest
2 to 3 eggs, fresh, whole
6 oz. unsalted butter, room temperature

What to do:


Combine the lemon juice, 3 oz. of the sugar, the cornstarch, and the zest in a saucepan and bring to a boil.

Place the eggs and remaining sugar in a bowl.  Mix well without aerating (that means no vigorous whisking folks, give the biceps a rest).

Temper* the eggs and remaining sugar with one quarter of the boiling juice.  Add the remaining juice and return to the stove.

Bring the mixture to a boil while whisking vigorously (oh biceps).  Continue mixing and boil for one minute.

Remove mixture from the heat and chill over an ice bath until the mixture reaches 120 F.

Add the butter in five parts, stirring well with a spatula after each addition.

Once butter is fully incorporated into the mixture place in lidded vessel (to prevent a skin from forming on top) and refrigerate.

This recipe yields a 1 lb. 6 oz. of lemon curd, that seems like a tremendous amount if you intend only to use it as a spread, so jar it up and share the wealth.  Otherwise it's a perfect amount for pie or tart filling.

*Ok a note on tempering; this is to prevent the eggs from curdling (I know, seems counterintuitive given the name of the recipe, but trust me you don't want chunks of scrambled eggs floating about in your otherwise perfectly delectable spread).  You'll need to slowly incorporate one quarter of the boiling juice into the rest of the egg and sugar mixture relatively slowly while whisking (ok now put those biceps into it!).  Then you'll be able to add the egg and sugar mixture into the rest of the hot mixture without ruining the overall texture of the product.